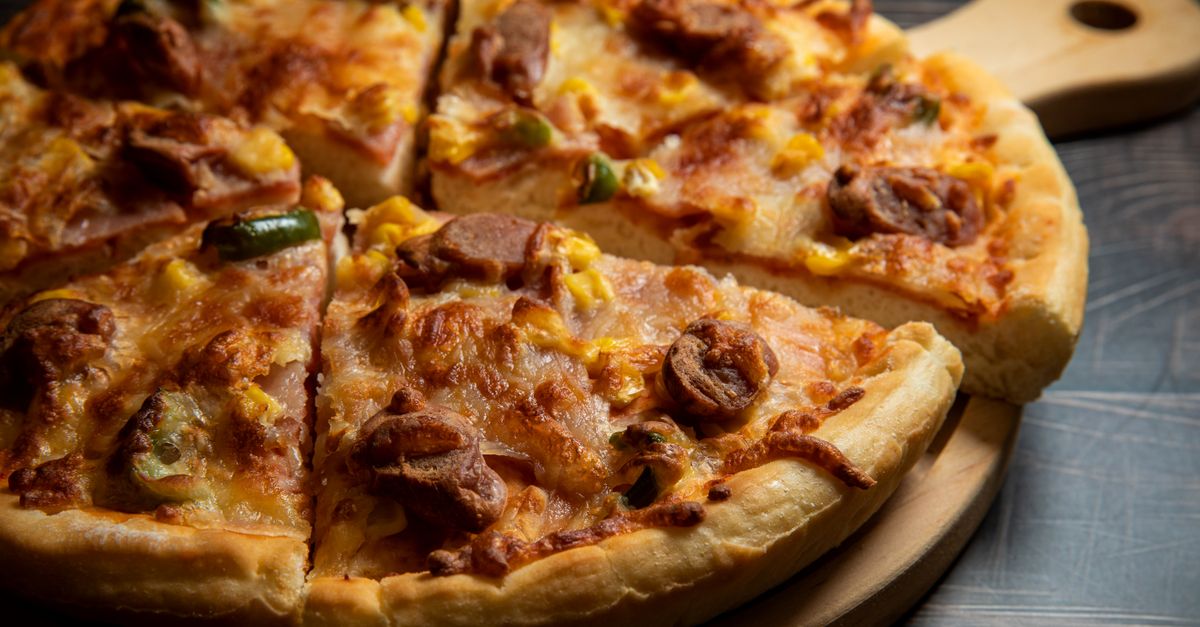
Why Your Homemade Pizza Crust Isn't Crispy (And The Pro Secrets That Deliver Pizzeria-Quality Crunch Every Time)
Is there anything more disappointing than pulling a beautiful homemade pizza out of the oven, only to find the crust is disappointingly limp or soggy? You’ve put in the effort, kneaded the dough, picked the freshest toppings, and the aroma filling your kitchen promises perfection. Yet, that satisfying crunch you crave, the one that defines a true pizzeria-quality slice, remains elusive. I’ve been there countless times, staring at a pizza that looks incredible but falters at the first bite. For years, my homemade pizzas were a game of Russian roulette – sometimes acceptable, often a soft, doughy letdown.
Most home bakers focus heavily on the dough recipe itself, meticulously measuring flour and yeast, believing that’s the sole key to success. While the dough is undoubtedly foundational, I’ve learned through countless experiments and more than a few frustrated evenings that a truly crispy crust is less about the initial ingredients and more about a handful of often-overlooked environmental and technique-based factors. It’s the subtle shifts in how you handle the dough, how you preheat, and what you bake it on that make all the difference. What changed everything for me wasn’t a new fancy flour, but a deeper understanding of moisture, heat transfer, and the science of crispness. You don’t need a commercial pizza oven; you just need to understand these crucial pro secrets.
Key Takeaways
- Ensure your dough is properly hydrated but not overly sticky, as excess moisture prevents crisping.
- Invest in a quality pizza steel or stone and preheat it thoroughly at your oven’s highest temperature for at least an hour.
- Use a light hand with sauce and toppings to avoid weighing down the crust and introducing too much moisture.
- Employ par-baking or a thin cornmeal dusting to create a barrier against moisture and enhance crispness.
The Hydration Trap: Why Too Much Moisture Sabotages Your Crunch
One of the biggest culprits behind a limp pizza crust isn’t a lack of baking time, but excessive moisture in your dough. Many recipes for a ‘chewy’ pizza crust push hydration levels quite high, sometimes up to 70% or 75%. While this can yield a wonderfully airy interior, it often comes at the cost of crispness, especially in a home oven. In my experience, the sweet spot for a reliably crispy crust in a standard home oven is a dough hydration between 60% and 65%. Any higher, and you’re fighting an uphill battle against the water content trying to steam rather than crisp.
Think about it: water needs to evaporate for browning and crisping to occur. If there’s too much water in the dough, the crust spends too much time drying out before it can even begin to achieve that golden, brittle texture. What changed everything for me was being more mindful of the initial dough consistency. A slightly drier dough is easier to handle, less prone to sticking, and crucially, has less moisture to expel. I now aim for a dough that feels soft and pliable but is not overtly sticky. If a recipe calls for higher hydration, I often dial it back by a few percentage points or add a tablespoon of flour at a time during the final kneading if the dough feels too wet.
This also applies to how you store and prepare your dough. If you’re making dough ahead of time and refrigerating it, allow it to come to room temperature for at least 30-60 minutes before shaping. Cold dough introduces more thermal inertia, meaning it takes longer to heat up and dry out, again leading to a steamed crust rather than a crispy one. A quick tip I picked up from a seasoned baker: after its final proof, gently press out any large air bubbles that might contribute to uneven cooking and trapping moisture.
The Power of Extreme Heat: Your Oven’s Hidden Potential
A crispy crust isn’t just about moisture content; it’s about moisture removal, and that requires intense, sustained heat. Most home ovens max out around 500-550°F (260-290°C), which is decent, but nowhere near the 800-900°F (425-480°C) of a commercial brick oven. The mistake I see most often is people simply turning on the oven and throwing in the pizza after 10-15 minutes. This is a recipe for a soggy bottom and a pale, chewy crust.
What truly changed my pizza game was investing in a quality pizza steel (or, if budget is a concern, a good pizza stone). These aren’t just baking surfaces; they are thermal batteries. The key is to preheat your oven, with the steel or stone inside, at its highest possible temperature for a minimum of 60 minutes, and ideally 90 minutes. This allows the steel to absorb and radiate a tremendous amount of heat. When your pizza hits that super-hot surface, it gets an immediate, intense burst of heat from the bottom, causing a rapid expansion of gases and an instant crisping effect on the base. This is the ‘oven spring’ for your crust.
In my own kitchen, I put my 1/4-inch steel on the second-to-top rack (to get good top-down heat for the toppings and cheese) and crank the oven to 550°F. Then, I set a timer for 90 minutes. This long preheat is non-negotiable for a truly crispy crust. Without it, the dough simply doesn’t get the thermal shock needed to crisp up before the toppings cook through. If you don’t have a steel or stone, a heavy-duty cast iron skillet or even an inverted baking sheet preheated for the same amount of time can offer a significant improvement over a cold baking tray.
The Topping Temptation: Less is More for Crispness
It’s tempting to pile on every delicious topping imaginable, transforming your pizza into a culinary mountain. However, this is one of the quickest ways to guarantee a soggy crust. Every additional topping introduces more weight and, more importantly, more moisture. Think about watery vegetables like mushrooms or bell peppers, or even excessive amounts of cheese and sauce – they all release moisture as they cook, which then steams the crust instead of letting it crisp.
What changed everything for me was adopting a ‘less is more’ philosophy, especially with the first layer of sauce and cheese. I now spread a very thin layer of sauce, ensuring it doesn’t pool in the center. I also learned to blot excess moisture from vegetables before adding them. For example, if I’m using fresh mozzarella, I’ll tear it into small pieces and let it drain on a paper towel for 10-15 minutes to remove excess whey. With mushrooms or spinach, a quick sauté beforehand can cook off a lot of their water content. This extra step prevents them from dumping moisture directly onto your delicate dough.
Remember, your goal is a balance. You want flavor, but not at the expense of texture. A light hand with toppings allows the crust to be the star, delivering that satisfying crunch without becoming a battleground for moisture. If you truly love a lot of toppings, consider a slightly thicker crust or par-baking it first to give it a head start on crisping.
The Par-Baking Advantage: A Head Start for the Base
If you’re still struggling with a persistently soft crust, or if you prefer a thicker style of pizza with more substantial toppings, par-baking your crust can be a game-changer. This technique involves partially baking the naked dough (or sometimes with just a thin layer of sauce) before adding all your toppings. It essentially gives the crust a head start, allowing some of its moisture to evaporate and set its structure before it gets weighed down.
In my kitchen, I’ve found par-baking particularly useful for deep-dish or Detroit-style pizzas, but it also works wonders for thin-crust varieties that you want extra crispy. The process is simple: stretch your dough onto your preheated pizza steel or stone, bake it for 3-5 minutes (until it’s just starting to set and perhaps show some light spots of browning), then remove it, add your toppings, and return it to the oven to finish baking. This initial burst of heat helps to create a drier, more stable base that is less susceptible to becoming soggy from wet ingredients.
Another trick I use, particularly for thinner crusts, is a very light dusting of cornmeal or semolina flour on the pizza peel before stretching the dough. This creates a tiny layer of friction that helps the pizza slide off the peel smoothly, but it also serves another purpose: it creates a very subtle barrier between the dough and the hot baking surface, preventing direct sticking and contributing to an even crispier bottom. It acts like tiny ball bearings, and those little grains get toasted to a beautiful golden crispness themselves.
The Post-Bake Ritual: Don’t Let it Wilt on the Plate
Finally, the battle for crispness isn’t over the moment your pizza comes out of the oven. How you handle it in those crucial first few minutes can make or break its texture. The biggest mistake after baking is letting the pizza sit on a flat surface like a cutting board or a dinner plate for too long. Residual heat trapped underneath will quickly turn your perfectly crispy crust into a steamy, soggy mess.
What changed everything for me was realizing the importance of immediate air circulation. As soon as your pizza is out, transfer it to a wire cooling rack. This allows air to circulate around the bottom of the crust, preventing steam buildup and letting that hard-earned crispness endure. If you cut it immediately, the steam has even more places to escape, helping to maintain that desirable texture. Slice it right on the wire rack if you can. If you must use a cutting board, make your cuts quickly and then transfer the slices back to the rack or serve immediately.
This might seem like a small detail, but it’s the capstone of all your efforts. You’ve worked hard to dry out that crust and apply intense heat; don’t let it re-absorb moisture in the final moments. Embrace the wire rack; it’s your last line of defense against the dreaded soggy bottom. I’ve found that even a few minutes on a flat surface can dramatically reduce the crispness, making all the previous steps less effective. This post-bake ritual ensures that every slice delivers that satisfying snap you’ve been chasing.
Frequently Asked Questions
Q: My pizza dough is sticking to the pizza peel. How can I get it to slide onto the hot stone/steel?
A: The most effective way is to use a generous dusting of cornmeal or semolina flour on your pizza peel (or a flat baking sheet if you don’t have a peel). Make sure your dough is stretched and topped quickly, and give the peel a sharp, confident jerk to slide the pizza off. Practice helps! Don’t let the dough sit on the floured peel for too long, as it can absorb the moisture and stick anyway.
Q: Does putting oil on the pizza crust help with crispness?
A: A very thin brush of olive oil on the edges of the crust can help promote browning and create a lovely crispness, especially if you’re looking for a slightly more golden-fried texture. However, avoid oiling the entire bottom of the crust excessively, as too much oil can lead to a greasy, heavy crust rather than a light, crispy one. Focus on the edges for flavor and color.
Q: Can I use parchment paper to help transfer the pizza?
A: Yes, you absolutely can! If you’re struggling with a peel, stretching your dough directly onto a piece of parchment paper is an excellent alternative. You can then transfer the entire pizza, parchment and all, onto your preheated pizza steel or stone. The parchment will typically crisp up and peel off easily after baking, or you can slide it out halfway through cooking. Just ensure your parchment paper is rated for your oven’s high temperature settings.
Q: My oven doesn’t go above 450°F (230°C). Can I still get a crispy crust?
A: While higher temperatures are ideal, you can still achieve good crispness. The key is extended preheating of your pizza steel or stone (at least 60-90 minutes) at your oven’s maximum temperature. Additionally, consider a slightly drier dough (60-62% hydration) and par-baking the crust for a few minutes before adding all your toppings. Using a light hand with wet toppings is also crucial at lower temperatures.
Q: How long should I cook a homemade pizza for a crispy crust?
A: Cooking time can vary depending on your oven, the thickness of your crust, and your chosen toppings. With a properly preheated pizza steel/stone at 500-550°F (260-290°C), a thin-crust pizza typically takes 6-10 minutes. Look for a golden-brown crust, bubbling cheese, and lightly charred spots on the edges. If you’re par-baking, the initial bake might be 3-5 minutes, followed by 5-7 minutes with toppings.
Conclusion
Achieving that elusive pizzeria-quality crispy crust at home isn’t about magic; it’s about understanding the science behind moisture and heat transfer. By dialing back dough hydration, diligently preheating your pizza steel or stone, practicing restraint with wet toppings, considering a strategic par-bake, and ensuring proper air circulation post-bake, you’ll transform your homemade pizzas from floppy disappointments to crunchy triumphs. These are the shifts that truly changed my pizza nights forever, and I’m confident they’ll do the same for yours. Get ready to hear that satisfying crackle – your best homemade pizza is just a few mindful steps away.
Written by Clara Thorne
Home & Hearth, Personal Organization
A former university archivist with a passion for unearthing forgotten practices and making them accessible.
You Might Also Like

Why Your Homemade Yogurt Lacks That Tangy Kick (And The Simple Shifts That Guarantee Complex Flavor)
Discover why your homemade yogurt falls flat on flavor and learn the simple, expert-backed techniques to achieve truly tangy, delicious results.

Why Your Homemade Sauces Are Breaking (And The Pro Secrets for Silky Smooth Perfection Every Time)
Ever wonder why your homemade sauces split or curdle? Learn the pro secrets to achieve silky smooth, stable sauces every time. Stop breaking your emulsions!
Why Your Homemade Pizza Crust Is Soggy (And What Actually Works for Pizzeria-Quality Crisp)
Tired of soggy homemade pizza? Discover the non-obvious mistakes sabotaging your crust and the pro tips for pizzeria-level crispness.