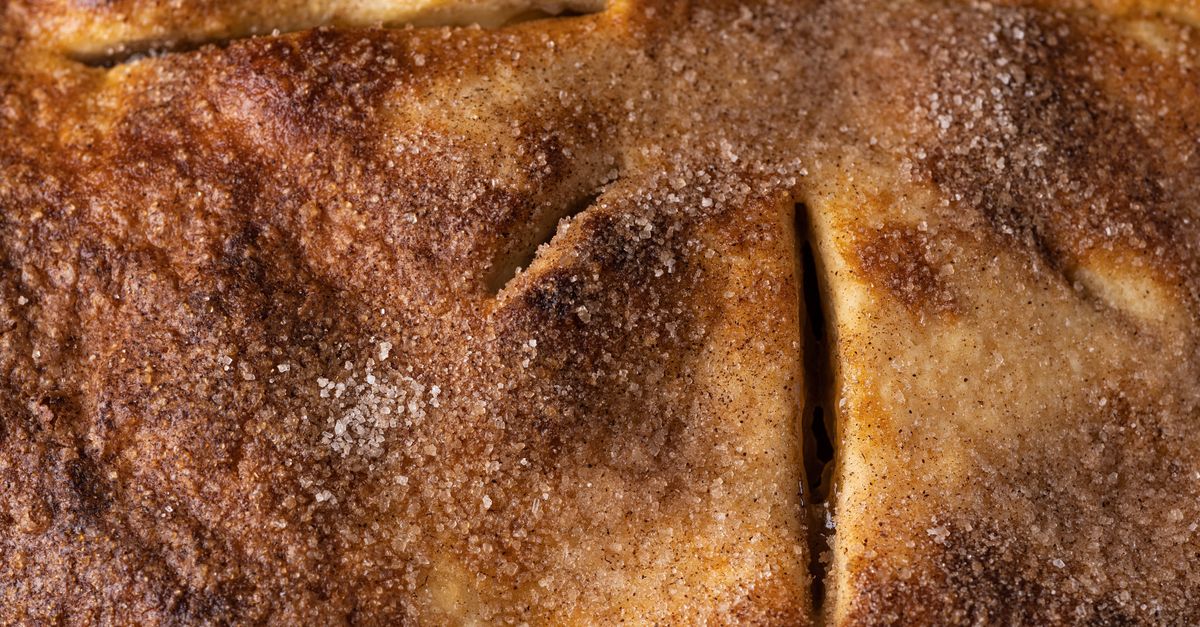
Why Your Homemade Pie Crust Isn't Flaky (And The Simple Shifts That Guarantee Tender, Golden Perfection Every Time)
Are you dreaming of a pie with a crust so tender it melts in your mouth and so flaky it shatters with a gentle touch? If your homemade pie crusts consistently come out tough, chewy, or crumbly, you’re not alone. I’ve been there, staring at a beautiful filling encased in a less-than-stellar pastry, wondering where I went wrong. It’s frustrating when you follow a recipe to the letter, yet the result is far from the golden, ethereal crust you envision. The truth is, achieving that coveted flaky texture isn’t about magical ingredients or complex techniques, but rather a few critical, often overlooked, details in your method. Once you understand these core principles, you’ll consistently bake pie crusts that rival any bakery.
Key Takeaways
- Embrace cold, high-quality fat and minimize its manipulation to create distinct layers that steam apart during baking.
- Use ice-cold water sparingly, adding just enough to bring the dough together without over-hydrating the gluten.
- Prioritize a gentle, minimal approach to mixing and handling the dough to prevent gluten development and maintain tenderness.
- Implement strategic chilling at multiple stages to keep fats firm, relax gluten, and ensure shape retention.
The Overlooked Power of Cold Fat: Why Butter Temperature Matters More Than You Think
When it comes to flaky pie crust, the single most critical factor is the state of your fat. Most recipes simply say “cold butter,” but in my experience, that’s an understatement. We’re talking ice-cold, almost frozen butter, and how you handle it. The goal is to have distinct, pea-sized pieces of butter (or other fat) suspended in your flour mixture. These pockets of fat are what create the magic during baking.
Here’s the science: as the pie bakes, the water content in these cold butter pieces turns into steam. This steam then pushes apart the layers of dough, creating those beautiful, airy pockets that define flakiness. If your butter is too warm, it melts into the flour too readily, forming a homogenous mixture rather than distinct layers. The result? A short, crumbly, or dense crust, but never truly flaky.
The mistake I see most often is overworking the butter into the flour. People use food processors or their hands for too long, turning the butter into a paste. What changed everything for me was adopting a more aggressive chilling strategy and a gentler incorporation method. I now cut my butter into small cubes and then freeze them for at least 15-20 minutes before even starting. Then, I use a pastry blender or even just my fingertips, working quickly to incorporate the butter until it resembles coarse meal with some larger, flattened pea-sized pieces still visible. The key is speed and minimal contact – you want to feel those little nuggets of butter, not a smooth, uniform mixture.
Another critical insight: the type of fat matters. While all-butter crusts offer unparalleled flavor, shortening or lard (especially leaf lard) yields incredible flakiness due to their higher melting points and plastic nature. For the absolute flakiest crust, a 50/50 blend of unsalted butter and shortening is my go-to. The butter provides flavor, and the shortening ensures maximum flakiness by resisting melting for longer.
The Ice-Cold Water Paradox: Just Enough, But Not a Drop More
Water is essential for binding your pie dough, but it’s also the silent killer of flakiness if not managed correctly. The primary purpose of water in pie dough is to hydrate the flour enough to form gluten, which provides structure, and to bring the dough together. However, too much water, or water that isn’t cold enough, can lead to a tough crust.
Firstly, always use ice-cold water. This is non-negotiable. I keep a glass of water with ice cubes chilling for at least 10 minutes before I even start mixing the dough. The cold water helps keep your fat solid, preventing it from melting prematurely into the flour. It also slows down gluten development. Gluten is what gives dough elasticity, but too much elasticity in pie crust results in toughness and shrinkage.
The mistake I frequently observe is adding too much water at once, or blindly following a recipe’s exact water measurement. Humidity, flour type, and even how firmly you pack your flour can affect how much water is needed. The ‘just enough, but not a drop more’ principle is paramount here. My method involves adding the ice water one tablespoon at a time, gently tossing with a fork or rubber spatula after each addition. You’re looking for the dough to barely come together when squeezed. It should still look quite shaggy and crumbly, not like a smooth, uniform ball of play-doh. I often stop when about 70-80% of the flour is hydrated, knowing that resting the dough will allow the remaining flour to absorb moisture.
When you squeeze a small amount of dough between your fingers, it should hold together without feeling wet or sticky. If it feels dry and falls apart, add another tablespoon of water. If it feels sticky, you’ve gone too far. This careful, incremental approach is what truly allows you to control gluten development and achieve a tender crust.
The Gentle Touch: Minimizing Handling for Maximum Tenderness
After you’ve incorporated your cold fat and carefully added just enough ice water, your next mission is to minimize handling the dough. Every touch, every knead, every roll develops more gluten. And while gluten is great for bread, it’s the enemy of tender, flaky pie crust.
The mistake most home bakers make is treating pie dough like bread dough. They knead it vigorously, striving for a smooth, elastic ball. What actually works is the opposite: embrace the shagginess. After adding the water, I gather the dough into two discs (for a double-crust pie) with as few movements as possible. I press it together just enough so it doesn’t fall apart, without actually kneading. The dough will look lumpy and somewhat uneven, and that’s exactly what you want.
Rolling the dough also requires a gentle hand. Instead of aggressively pushing and stretching, use short, even strokes from the center outwards, rotating the dough frequently. Lift and turn the dough often to prevent sticking and ensure even thickness. If the dough resists, stop. This resistance is the gluten protesting. Let it rest for 10-15 minutes, allowing the gluten to relax, then resume rolling. I’ve found that using a light dusting of flour on my work surface and rolling pin, and a pastry mat with measurements, helps immensely to avoid over-handling.
This gentle approach extends to crimping the edges and transferring the dough. Overworking the edges can lead to toughness, and stretching the dough when moving it to the pie plate can cause shrinkage during baking. Be decisive but delicate. This respect for the delicate structure you’ve built ensures your crust remains tender.
The Unsung Hero: Strategic Chilling at Every Stage
Chilling is not just a suggestion; it’s a fundamental step that contributes significantly to a flaky, well-structured pie crust. Strategic chilling at multiple stages is what prevents butter from melting, gluten from over-developing, and your pie crust from shrinking.
The initial chill: After forming your dough into discs, chill them for at least 30 minutes, or preferably an hour, before rolling. This allows the gluten to relax, making the dough easier to roll without fighting back. More importantly, it re-chills the fat, ensuring it’s firm and ready to create those steam pockets.
The mid-roll chill (if needed): If your kitchen is warm, or you find your dough getting sticky or tearing while rolling, don’t hesitate to pop it back into the fridge for 10-15 minutes. This prevents the butter from softening and allows the gluten to relax again. This little pause can save your crust from becoming tough.
The pre-bake chill: Once your pie crust is in the pie plate, trimmed, and crimped, chill it again for at least 20-30 minutes before filling or baking. For blind-baked crusts, a solid 30-minute chill with pie weights is essential. This final chill is crucial for preventing shrinkage and maintaining the crimped edge definition. The cold fat will hit the hot oven, creating an immediate steam burst and superior flakiness. If I’m baking a filled pie, I even pop the entire unbaked pie into the freezer for 10 minutes right before it goes into the oven. This ensures the crust is as cold as possible for maximum lift and flakiness.
Ignoring these chilling steps is one of the quickest ways to end up with a tough, sad-looking crust that has shrunk down the sides of your pie plate. Embrace the chill, and your pie crust will thank you with superior texture and stability.
Frequently Asked Questions
Q: Can I use oil instead of butter or shortening for pie crust?
A: While you can make a crust with oil, it won’t yield the same flaky texture. Oil coats the flour completely, preventing distinct fat pockets from forming, which are essential for flakiness. The result is typically a very tender, crumbly crust, more like a shortbread cookie than a classic flaky pie crust. For true flakiness, stick to solid fats like butter, shortening, or lard.
Q: My pie crust always shrinks from the edges of the pie plate. How do I stop this?
A: Shrinkage is almost always due to overworking the dough, which develops too much gluten, and insufficient chilling. Ensure you’re handling the dough minimally, adding just enough water, and most importantly, chilling the dough thoroughly after it’s in the pie plate (at least 20-30 minutes, or even a quick freeze). This relaxes the gluten and firms up the fat, preventing it from contracting in the hot oven.
Q: How can I tell if I’ve added enough water but not too much?
A: Take a small handful of the shaggy dough and squeeze it. It should just barely hold together without feeling wet or sticky. If it crumbles apart, add another tablespoon of ice water and gently mix. If it feels wet, you’ve gone too far. Err on the side of slightly less water, as the dough will continue to hydrate as it rests.
Q: My pie crust sometimes turns out pale. How can I get that golden-brown color?
A: For a beautiful golden crust, ensure your oven is preheated to the correct temperature (and consider an oven thermometer to verify). Some recipes benefit from a slight increase in baking temperature for the first 15-20 minutes to encourage browning. An egg wash (beaten egg with a tablespoon of water or milk) brushed over the crust before baking will also create a rich, glossy, golden finish. Don’t be afraid to let it bake long enough for color development, covering edges with foil if they brown too quickly.
Q: Is it better to use a food processor or my hands for making pie dough?
A: Both methods can work, but a food processor can quickly overmix the butter if you’re not careful, leading to a less flaky crust. If using a food processor, pulse in short bursts until the mixture resembles coarse meal with some pea-sized butter pieces remaining. For ultimate control, a pastry blender or your hands (working very quickly) allows you to feel the texture and ensures you don’t overwork the butter. Whichever method you choose, the key is to keep everything as cold as possible and work quickly.
In my journey to pie perfection, these shifts in understanding and technique made all the difference. Stop fighting your pie dough, and start working with its natural tendencies. Embrace the cold, be judicious with water, handle it gently, and give it plenty of time to chill. You’ll be rewarded with a tender, flaky, golden crust that will elevate any pie, making it truly irresistible. Happy baking!
Written by Clara Thorne
Home & Hearth, Personal Organization
A former university archivist with a passion for unearthing forgotten practices and making them accessible.
You Might Also Like

Why Your Homemade Yogurt Lacks That Tangy Kick (And The Simple Shifts That Guarantee Complex Flavor)
Discover why your homemade yogurt falls flat on flavor and learn the simple, expert-backed techniques to achieve truly tangy, delicious results.

Why Your Homemade Sauces Are Breaking (And The Pro Secrets for Silky Smooth Perfection Every Time)
Ever wonder why your homemade sauces split or curdle? Learn the pro secrets to achieve silky smooth, stable sauces every time. Stop breaking your emulsions!
Why Your Homemade Pizza Crust Is Soggy (And What Actually Works for Pizzeria-Quality Crisp)
Tired of soggy homemade pizza? Discover the non-obvious mistakes sabotaging your crust and the pro tips for pizzeria-level crispness.