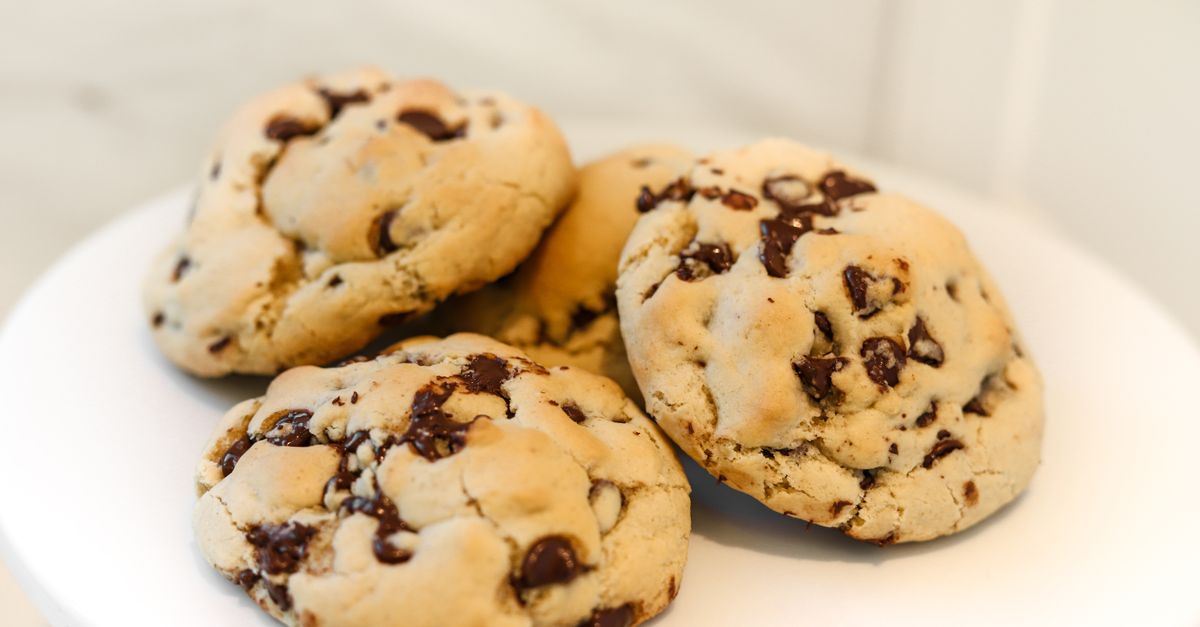
Why Your Homemade Cookies Are Crumbly (And The Simple Shifts That Guarantee Chewy Perfection Every Time)
Are you tired of biting into what you hoped would be a soft, chewy cookie, only to find it crumble into a dry, dusty mess? I’ve been there more times than I care to admit. For years, my quest for the perfect homemade chocolate chip cookie was plagued by this very issue. They looked beautiful on the cooling rack, but the moment I picked one up, it disintegrated. It was disheartening, to say the least.
Most recipes promise ‘chewy’ or ‘soft,’ but achieving that elusive texture consistently feels like a dark art. The mistake I see most often, and one I certainly made, is thinking that ‘crumbly’ is just a natural outcome of baking, or that it’s due to one obvious misstep like too much flour. What changed everything for me wasn’t a secret ingredient or a fancy technique, but rather a deeper understanding of how basic baking principles interact. It’s about recognizing the subtle signals your dough and oven are sending and making small, but critical, adjustments. This isn’t just about rescuing a single batch; it’s about transforming your entire cookie-baking game from frustrating guesswork to confident, chewy success.
Key Takeaways
- Precise ingredient measurement, especially flour, is crucial for preventing dry, crumbly cookies.
- The right butter temperature and creaming technique are essential for creating the structure that leads to chewy cookies.
- Avoid overbaking at all costs; pull cookies when they still look slightly underdone in the center.
- Allowing cookies to cool completely on the baking sheet helps them set properly and retain moisture for chewiness.
The Unseen Enemy: Your Flour Measurement Is Likely Off
When I first started baking, I treated flour like, well, flour. I’d grab my measuring cup, scoop directly from the bag, and level it off. Simple, right? Wrong. This, my friends, is the silent saboteur of many a cookie batch. Flour compacts easily, and scooping directly from the bag can add anywhere from 20% to 30% more flour than the recipe intends. More flour means less moisture, and less moisture directly translates to a dry, crumbly cookie.
In my experience, shifting to the ‘spoon and level’ method was a game-changer. Instead of scooping, I now use a spoon to lightly fluff the flour in its container, then gently spoon it into my measuring cup until it’s overflowing. Finally, I use the flat edge of a knife to level off the excess. This seemingly small adjustment ensures I’m consistently using the correct amount of flour. For even greater precision, especially for critical recipes, I weigh my flour using a digital kitchen scale. Most recipes list gram measurements, and if they don’t, a quick online search can give you the correct conversion for common flours (e.g., 1 cup all-purpose flour is typically around 120-125 grams). This level of precision virtually eliminated my crumbly cookie problem and is the first, most fundamental step to achieving that desired chew.
The Butter Paradox: Temperature and Creaming Matter More Than You Think
Another common misconception I see is the casual approach to butter. Recipes often say ‘softened butter,’ and many interpret this as ‘butter that’s been out on the counter for 10 minutes.’ The truth is, butter temperature is incredibly specific, and it profoundly impacts cookie texture. Butter that’s too cold won’t cream properly, leaving solid chunks that bake into a dense, crumbly texture. Butter that’s too warm (starting to melt or greasy) can’t hold air when creamed, leading to flat, greasy cookies that can also dry out easily.
The sweet spot for softened butter is around 65-67°F (18-19°C). It should yield slightly when pressed, but still feel cool to the touch. What changed everything for me was learning the proper creaming technique: beating butter and sugar together until it’s light, fluffy, and noticeably pale in color. This process incorporates air, which is crucial for a tender, chewy crumb. I used to rush this step, thinking ‘creamed’ meant just combined. Now, I let my stand mixer (or hand mixer) go for a solid 3-5 minutes, scraping down the sides often. You’ll actually see the mixture transform, almost doubling in volume. This aeration creates pockets that trap moisture, giving your cookies that delightful chew rather than a brittle break.
The Overbaking Folly: Your Oven is Your Biggest Foe (or Friend)
This is perhaps the most painful lesson I learned: overbaking is the single greatest enemy of chewy cookies. It’s so tempting to wait until the edges are deep golden brown and the centers look perfectly set. But by then, it’s often too late. The moisture has evaporated, and you’re left with a crunchy, crumbly cookie.
My breakthrough came when I started pulling my cookies from the oven when they looked slightly underdone in the center. The edges should be golden brown, but the centers should still look soft, maybe even a little pale or glossy. They will continue to bake from residual heat on the hot baking sheet even after they come out of the oven. I generally reduce the baking time by about 1-2 minutes from what a recipe suggests as a starting point, and I always check at the earliest recommended time. For example, if a recipe says ‘bake for 9-12 minutes,’ I’ll start checking at 8 minutes. You need to trust the process here. The cookies might seem too soft to move at first, but that brings me to the next crucial point.
The Cooling Conundrum: Patience is a Virtue (and the Key to Chewiness)
After successfully underbaking (which sounds wrong, but is so right!), the next step is often where impatience takes over. Many recipes tell you to transfer cookies to a wire rack after a minute or two. For certain cookie types, that’s fine. But for chewy cookies, this can be a fatal error, contributing to crumbliness. Why? Because those few minutes on the hot baking sheet are where the magic happens.
What truly made a difference for my cookie texture was allowing them to cool on the baking sheet for a solid 5-10 minutes (depending on size) before attempting to move them. During this time, the residual heat from the baking sheet continues to cook the cookie gently, allowing the sugars to fully set and solidify. Crucially, it also allows the internal moisture to redistribute throughout the cookie. If you move them too soon, they don’t have time to set properly, often break, and lose valuable moisture too quickly to the air. After this critical cooling period on the sheet, then transfer them to a wire rack to cool completely. This two-stage cooling process is essential for achieving that resilient, chewy bite that holds together rather than crumbling.
The Sugar Ratio Shift: Balance for Better Bite
While precise measurement is key, the type of sugar used, and its ratio to other ingredients, also plays a significant role in preventing crumbliness and achieving chewiness. Many recipes focus solely on granulated sugar, but for truly chewy cookies, you need a healthy dose of brown sugar.
Brown sugar contains molasses, which is hygroscopic, meaning it attracts and retains moisture. This molasses is what contributes significantly to the soft, chewy texture and slightly fudgy flavor that prevents a dry, crumbly outcome. In my early baking days, I’d sometimes substitute brown sugar with granulated if I was running low. Big mistake. What changed for me was actively seeking out recipes with a higher brown sugar to granulated sugar ratio, or even experimenting with replacing a portion of the granulated sugar with more brown sugar in my go-to recipes. For instance, if a recipe calls for 1 cup granulated sugar and ½ cup brown sugar, I might try ⅔ cup granulated and ⅔ cup brown. This simple ratio adjustment, combined with accurate measuring, locks in moisture and provides a more pliable, less crumbly structure. It’s a fundamental aspect of cookie chemistry that can’t be overlooked if chewiness is your goal.
The ‘Resting’ Revelation: A Little Chill Time Goes a Long Way
This might sound counter-intuitive when you’re craving fresh-baked cookies, but sometimes, the best thing you can do for your dough is absolutely nothing… for a little while. I used to mix my dough and immediately scoop it onto the baking sheet. While perfectly acceptable for some recipes, I found my chewiest, most consistently non-crumbly cookies came from dough that had a chance to chill.
What changed everything for me was incorporating a minimum 30-minute (or even overnight) chill time for my cookie dough. This isn’t just about preventing spread; it’s about flavor development and, crucially, moisture distribution. During chilling, the flour has more time to fully hydrate with the liquids in the dough, preventing that dry, ‘floury’ crumb. The fats also solidify, meaning the cookies spread less and stay thicker, which helps retain moisture. I’ve noticed a significant difference in the structure of the baked cookie when the dough has been chilled – it’s more cohesive and less prone to crumbling. Even a quick 15-minute chill can make a noticeable difference if you’re short on time. It’s an often-skipped step that truly elevates cookie texture.
Frequently Asked Questions
Q: Why do my cookies look perfectly fine but crumble when I pick them up?
A: This is a classic sign of too much flour or overbaking. Ensure you’re measuring your flour accurately (spoon and level, or weigh it), and pull your cookies from the oven when their centers still look slightly underdone. The residual heat on the baking sheet will finish cooking them, allowing them to set without drying out.
Q: Can adding more liquid fix crumbly cookies?
A: While adding a tiny bit more liquid (like milk or an extra egg yolk) can sometimes help, it’s often a band-aid solution if the core problem is over-flouring or overbaking. It’s better to address the root cause by measuring flour correctly and preventing overbaking. Too much liquid can also change the cookie’s texture, leading to a cakey rather than chewy result.
Q: Does the type of sugar really make a difference for chewiness?
A: Absolutely! Brown sugar, with its molasses content, is a key player in chewy cookies because it retains moisture. Granulated sugar tends to make cookies crisper. For optimal chewiness, ensure your recipe has a good proportion of brown sugar, or consider slightly increasing the brown sugar and decreasing the granulated sugar if your cookies are consistently too crumbly.
Q: How can I tell if my butter is the right temperature for creaming?
A: Softened butter should be cool to the touch, around 65-67°F (18-19°C), and you should be able to make a slight indentation with your finger without it sinking in too much or feeling greasy. If it’s too cold, microwave it in 5-second bursts until it reaches the right consistency. If it’s too warm, chill it in the fridge for 10-15 minutes until it firms up slightly.
Q: My cookies are still a bit dry after trying these tips. What else could it be?
A: Beyond flour and overbaking, check your oven temperature. Many ovens run hot or cold, which can drastically affect baking. Consider getting an inexpensive oven thermometer to verify accuracy. Also, ensure your leavening agents (baking soda/powder) are fresh; expired ones can impact texture. Finally, make sure you’re using fresh, high-quality ingredients overall.
Baking the perfect cookie is a journey of understanding and subtle adjustments, not just blindly following a recipe. By focusing on these often-overlooked details—accurate flour measurement, proper butter handling, vigilant baking times, patient cooling, and the right sugar balance—you’ll transform your cookie-baking results from crumbly disappointments to consistently chewy delights. Give these shifts a try, and prepare to enjoy the kind of homemade cookies you’ve always dreamed of. Your taste buds (and your friends!) will thank you.
Written by Clara Thorne
Home & Hearth, Personal Organization
A former university archivist with a passion for unearthing forgotten practices and making them accessible.
You Might Also Like

Why Your Homemade Yogurt Lacks That Tangy Kick (And The Simple Shifts That Guarantee Complex Flavor)
Discover why your homemade yogurt falls flat on flavor and learn the simple, expert-backed techniques to achieve truly tangy, delicious results.

Why Your Homemade Sauces Are Breaking (And The Pro Secrets for Silky Smooth Perfection Every Time)
Ever wonder why your homemade sauces split or curdle? Learn the pro secrets to achieve silky smooth, stable sauces every time. Stop breaking your emulsions!

Why Your Homemade Pizza Crust Is Soggy (And What Actually Works for Pizzeria-Quality Crisp)
Tired of soggy homemade pizza? Discover the non-obvious mistakes sabotaging your crust and the pro tips for pizzeria-level crispness.